Table
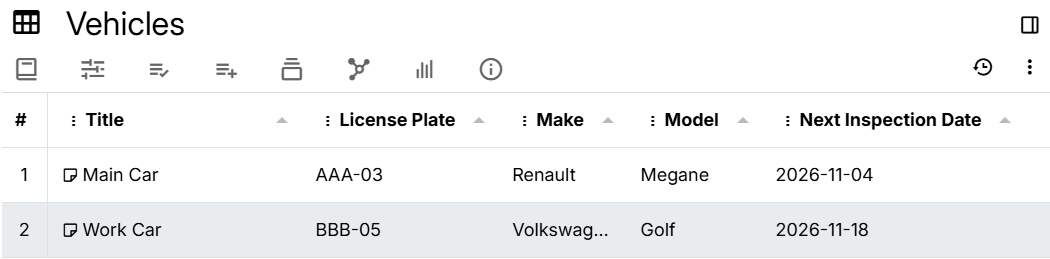
The table view displays information in a grid, where the rows are individual notes and the columns are Promoted Attributes. In addition, values are editable.
How it works#
The tabular structure is represented as such:
- Each child note is a row in the table.
- If child rows also have children, they will be displayed under an expander (nested notes).
- Each column is a promoted attribute that is defined on the Collection note.
- Actually, both promoted and unpromoted attributes are supported, but it's a requirement to use a label/relation definition.
- The promoted attributes are usually defined as inheritable in order to show up in the child notes, but it's not a requirement.
- If there are multiple attribute definitions with the same
name, only one will be displayed.
There are also a few predefined columns:
- The current item number, identified by the
#symbol.- This simply counts the note and is affected by sorting.
- Note ID, representing the unique ID used internally by Trilium
- The title of the note.
Interaction#
Creating a new table#
Right click on an existing note in the Note Tree and select Insert child note and look for Table.
Adding columns#
Each column is a promoted or unpromoted attribute that is defined on the Collection note.
To create a new column, either:
- Press Add new column at the bottom of the table.
- Right click on an existing column and select Add column to the left/right.
- Right click on the empty space of the column header and select Label or Relation in the New column section.
Adding new rows#
Each row is actually a note that is a child of the Collection note.
To create a new note, either:
- Press Add new row at the bottom of the table.
- Right click on an existing row and select Insert row above, Insert child note or Insert row below.
By default it will try to edit the title of the newly created note.
Alternatively, the note can be created from the Note Tree or scripting.
Context menu#
There are multiple menus:
- Right clicking on a column, allows:
- Sorting by the selected column and resetting the sort.
- Hiding the selected column or adjusting the visibility of every column.
- Adding new columns to the left or the right of the column.
- Editing the current column.
- Deleting the current column.
- Right clicking on the space to the right of the columns, allows:
- Adjusting the visibility of every column.
- Adding new columns.
- Right clicking on a row, allows:
- Opening the corresponding note of the row in a new tab, split, window or quick editing it.
- Inserting a new note above or below the selected row. These options are only enabled if the table is not sorted.
- Inserting a new child note for the selected row.
- Deleting the row.
Editing data#
Simply click on a cell within a row to change its value. The change will not only reflect in the table, but also as an attribute of the corresponding note.
- The editing will respect the type of the promoted attribute, by presenting a normal text box, a number selector or a date selector for example.
- It also possible to change the title of a note.
- Editing relations is also possible
- Simply click on a relation and it will become editable. Enter the text to look for a note and click on it.
- To remove a relation, remove the title of the note from the text box and click outside the cell.
Editing columns#
It is possible to edit a column by right clicking it and selecting Edit column. This will basically change the label/relation definition at the collection level.
If the Name field of a column is changed, this will trigger a batch operation in which the corresponding label/relation will be renamed in all the children.
Working with the data#
Sorting by column#
By default, the order of the notes matches the order in the Note Tree. However, it is possible to sort the data by the values of a column:
- To do so, simply click on a column.
- To switch between ascending or descending sort, simply click again on the same column. The arrow next to the column will indicate the direction of the sort.
- To disable sorting and fall back to the original order, right click any column on the header and select Clear sorting.
Reordering and hiding columns#
- Columns can be reordered by dragging the header of the columns.
- Columns can be hidden or shown by right clicking on a column and clicking the item corresponding to the column.
Reordering rows#
Notes can be dragged around to change their order. To do so, move the mouse over the three vertical dots near the number row and drag the mouse to the desired position.
This will also change the order of the note in the Note Tree.
Reordering does have some limitations:
- If the parent note has
#sorted, reordering will be disabled. - If using nested tables, then reordering will also be disabled.
- Currently, it's possible to reorder notes even if column sorting is used, but the result might be inconsistent.
Nested trees#
If the child notes of the collection also have their own child notes, then they will be displayed in a hierarchy.
Next to the title of each element there will be a button to expand or collapse. By default, all items are expanded.
Since nesting is not always desirable, it is possible to limit the nesting to a certain number of levels or even disable it completely. To do so, either:
- Go to Collection Properties and look for the Max nesting depth section.
- To disable nesting, type 0 and press Enter.
- To limit to a certain depth, type in the desired number (e.g. 2 to only display children and sub-children).
- To re-enable unlimited nesting, remove the number and press Enter.
- Manually set
maxNestingDepthto the desired value.
Limitations:
- While in this mode, it's not possible to reorder notes.
Limitations#
- Multi-value labels and relations are not supported. If a Promoted Attributes is defined with a Multi value specificity, they will be ignored.
- There is no support to filter the rows by a certain criteria. Consider using the table view in search for that use case.
Use in search#
The table view can be used in a Saved Search by adding the #viewType=table attribute.
Unlike when used in a Collection, saved searches are not limited to the sub-hierarchy of a note and allows for advanced queries thanks to the power of the Search.
However, there are also some limitations:
- It's not possible to reorder notes.
- It's not possible to add a new row.
Columns are supported, by being defined as Promoted Attributes to the Saved Search note.
Editing is also supported.